Garden Furniture Covers: Clean vs Replace Decision
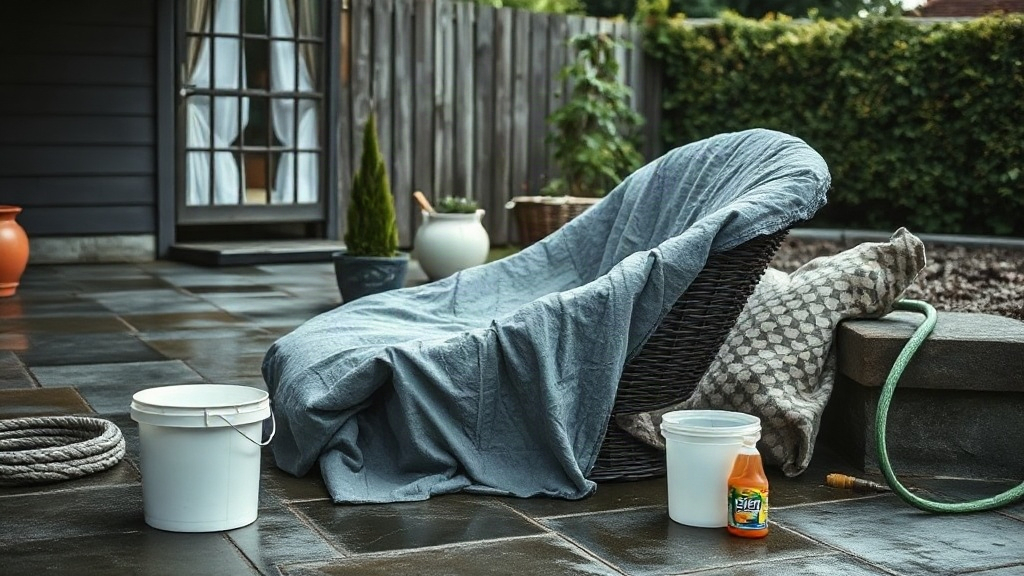
As an Amazon Associate we earn from qualifying purchases. This page contains affiliate links — if you buy through them, we earn a small commission at no extra cost to you.
Replacing a garden furniture cover typically costs £30–80. Cleaning one costs about £2 in bleach and half an hour of your time. That gap is the entire economic case this article is built on, and yet most people skip straight to buying a replacement the moment last year’s cover comes off looking grey and mouldy — the classic scene of pulling a cover off a £500 rattan set in spring and finding it stiff, damp-smelling, and apparently ruined.
Here’s what’s worth knowing before you spend that money: the mould that wrecked the look of your cover almost never means the fabric itself is finished. What actually failed, in most cases, is a habit rather than the material — putting the cover back on furniture, or folding it away, before it was properly dry. That single mistake does more damage to UK covers than sun, frost, and old age combined.
A decent cover — the sort that retails for £30–80 — should give three to five years of service if it’s looked after properly, and a couple of cleans a year can stretch that further. What follows is a straightforward way to tell which situation you’re actually in, and how to clean the cover properly if the answer is “clean it.”
Why UK Covers Actually Fail
Garden centres mostly stock covers in one of three fabrics: polyester, polypropylene, or PVC. Polyester and polypropylene dominate the mid-range — lighter, easier to handle, and more breathable than PVC. PVC covers are tougher and more genuinely waterproof, but heavier, harder to store, and prone to cracking in a hard frost.
None of that is what actually kills most covers. Mould is. Mould spores are everywhere in outdoor air, and a UK autumn-into-winter cycle is close to ideal conditions for them. When a cover stays damp for any real length of time — which in this country tends to mean most of the winter — spores settle on the fabric, feed on the organic matter trapped in it, and break down the waterproofing layer underneath: usually a polyurethane (PU) coating bonded to the reverse side. Mould attacks that coating from below, where you can’t see it happening.
The tell is a greyish-white, powdery layer on the underside, often with a musty smell. The outer fabric can look completely fine — you might even wipe the surface clean and think the problem’s gone. But once the PU coating has been compromised, the cover’s actual job, keeping water off your furniture, starts to fail. Water gets through in patches, usually wherever the cover stayed wettest for longest.
The other way covers die is UV. Over three to five years, sunlight breaks down the fibres and coatings regardless of how well you look after the cover. The fabric turns brittle and loses tear resistance — it starts to feel thinner or papery, or the stitching frays, with no mould in sight. This is ordinary end-of-life, and unlike mould damage, there’s no reversing it.
UK winters push both failure modes along. Rain, then frost, then more rain is exactly the cycle that lets mould take hold and UV damage build up — three or four UK winters do more to a cover than the same stretch of time in a drier climate ever would. And the single error that turns up again and again in owner forums and reviews is the same one: putting the cover back on furniture that’s still damp from rain or cleaning. The cover traps that moisture against the frame, building a warm, humid microclimate that mould thrives in. The furniture suffers for it, but so does the cover — within a couple of seasons, what looked like a sound investment has become a mould factory.
Cleaning Your Cover Properly
The process itself is simple and takes under thirty minutes once everything’s set up. Timing matters more than technique: do it at both ends of the season — once in autumn before the furniture goes under cover for winter, and again in early summer when you’re taking the cover off for use.
What you’ll need:
- A large bucket or basin
- Warm water
- A mild bleach solution (roughly 1 part bleach to 10 parts water — strong enough to kill mould without damaging the fabric)
- A soft brush — a nail brush or an old washing-up brush both work; avoid anything abrasive that could damage the outer coating
- A hosepipe, or another source of clean water for rinsing
Step 1 — Remove the cover and shake off debris. Do this on a dry, breezy day. Shake out dead leaves, twigs, and grit thoroughly; all of it holds moisture and gives mould something to feed on. A quick hose-down first helps if there’s a lot of debris.
Step 2 — Mix your solution and scrub the underside. That’s where the mould damage happens, so that’s where the cleaning needs to happen. Work the bleach solution into any mould patches with your brush and let it sit for five to ten minutes — bleach needs contact time to actually kill the spores, not just bleach them white. Lighter surface mould can often be handled with warm water and a mild detergent alone; save the bleach solution for patches that are visibly established, since it’s harsher on the fabric if you use it every time.
Step 3 — Rinse until every trace of bleach is gone. Leftover bleach keeps degrading the fibres, and it can stain your furniture if you put the cover back on while residue is still there. A hose does the job, or a bath if the cover’s small enough to fit.
Step 4 — Dry it completely before it goes anywhere. This is the step people skip, and it’s the one that matters most. Bone dry, not just surface dry — feel the underside with your hand, and if it’s at all cool or damp, it isn’t ready. In a breezy, sunny spot that might take a couple of hours; in a grey British autumn, most of a day. A cover stored even slightly damp comes back out mouldier than it went in.
Once it’s properly dry, fold it loosely rather than compressing it tight, and store it somewhere dry — a shed, garage, or spare room all work. The aim is simply to keep it dry and out of direct UV until it’s needed again. If your winter turns out to be a wet one, it’s worth lifting the cover every few weeks regardless of the twice-a-year routine — let the furniture breathe for an hour, wipe away any condensation, and confirm everything’s dry before it goes back on.
One thing not to do: pressure wash it. It sounds like the obvious tool for the job, but it forces water into the fabric and stitching and can damage the PU coating directly — spending £2 on bleach to save £30–80 on a replacement only works if you don’t undo it with a jet washer.
Now you know what to look for—Get the Free Garden Furniture Care Checklist to help you build this into a seasonal routine.
Branded sprays aimed specifically at furniture covers — Fabsil Universal Protector (paid link) and Nikwax Tent & Gear SolarProof (paid link) are the two you’ll see most often — do have a place, particularly for refreshing the waterproofing on a cover that’s still structurally sound. What they can’t do is rescue a cover that’s been left damp for six months under a patio chair; that damage is already done underneath, and no amount of spray-on treatment reaches it. Treat them as maintenance for a cover you’ve already looked after properly, not a fix for one you haven’t. Used on a cover that’s been dried and stored correctly, a product like Fabsil can restore the durable water repellent (DWR) finish and buy it another season or two — money well spent, but only after the bleach-and-dry process, not instead of it.
See current price on Amazon → (paid link)
The Clean vs Replace Verdict
Before you get into delamination and drying times, the more useful question is what you’re actually protecting. A £60 cover guarding a £1,000 rattan set is cheap insurance — replace it readily, well before it’s actually failed, because the cost of being wrong (a soaked, mould-damaged set) massively outweighs the cost of a new cover. A cover on a mid-range set you’ve had five years and aren’t especially attached to is the opposite bet: push it right up to the point of genuine failure, because there’s very little at stake if you’re a season late replacing it.
Once you know which side of that line you’re on, the physical test is the same either way: clean until the cover delaminates, replace when it does. A cover with surface mould, a musty smell, and some stiffness from damp can almost always be brought back — the fabric hasn’t failed, only the PU coating underneath has been attacked, and killing the mould and drying the cover properly restores it. The line you’re watching for is delamination: visible peeling or flaking of the coating on the underside, or water soaking straight through the fabric in dry conditions. Once either of those shows up, the waterproofing is gone for good, and the cover starts working against you — trapping moisture rather than shedding it.
| Cover Material | Typical Retail Price | Typical Lifespan | Best For |
|---|---|---|---|
| Polyester | £30–£50 | 3–5 years | General use, breathable |
| Polypropylene | £40–£70 | 3–5 years | Lightweight, easy to handle |
| PVC | £50–£80 | 3–5 years | Heavy duty, fully waterproof |
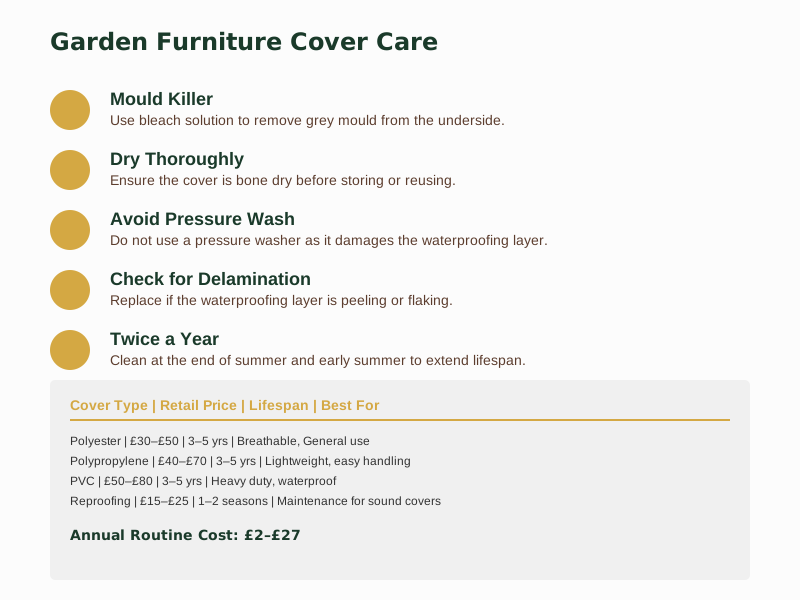
Cleaning, done properly twice a year, typically adds one to two seasons onto a structurally sound cover — which for most people is the difference between one replacement purchase and none. In short: clean when the fabric’s intact but mouldy, smelly, or stiff. Replace when it’s delaminating, letting water through in dry conditions, or no longer fits because the material has stretched or shrunk. Either way, hold onto the old cover — it’s a useful spare for a sudden downpour, or for protecting cushions over summer.
Signs It’s Time to Replace
If you’ve cleaned the cover properly and it’s still not up to the job, any one of the following is reason enough to replace it rather than push on:
Visible delamination. The underside shows peeling, flaking, or a powdery residue that won’t scrub off — once the PU coating is physically separating from the fabric, the waterproofing is finished.
Water soaking through in dry conditions. Pour water over a flat section of the cover. If it soaks in rather than beading and running off, the waterproofing has failed — often in patches first, wherever water tends to pool longest.
Brittle, papery fabric. Tears easily, particularly at the seams or fastening points. This is UV and weather damage rather than mould: the fibres have broken down and lost their structural integrity.
A cover that no longer fits. Uneven stretching or shrinking, usually from repeated wetting and drying, leaves gaps that let water in at the sides — a cover that doesn’t fully reach around the furniture any more isn’t doing its job.
A mould smell that survives cleaning. If the cover still smells musty after a proper bleach, scrub, and dry cycle, the mould has worked its way into the fibres themselves rather than sitting on the surface. It will keep transferring that smell — and potentially staining — to whatever’s underneath.
Whatever you do, don’t put a compromised cover back on the furniture on the theory that it’ll do a partial job. A cover that lets water through in patches is worse than no cover at all: it holds moisture against the furniture and recreates the exact conditions you were trying to avoid in the first place.
As an Amazon Associate we earn from qualifying purchases. The products linked above are ones we recommend based on independent research and owner feedback.
Where to Go From Here
The decision comes down to one working rule: cover mouldy but fabric intact, clean it. PU coating delaminating or water soaking through, replace it. That single rule resolves the large majority of cases you’ll actually run into, and it keeps £30–80 in your pocket every time the answer turns out to be “clean.”
The habit that makes the decision less urgent in the first place matters more than the rule itself: dry the furniture before you cover it, dry the cover before you store it, and lift the cover on any dry, mild day through winter so everything gets a chance to breathe.
Related Guides
For a complete overview, see our How to Clean Garden Furniture Safely (Patio Set Guide).
If you’d rather have this as a written routine than rely on remembering it, the Free Garden Furniture Care Checklist puts the whole seasonal cycle — covers and the rest of the furniture — into one simple plan you can just follow.